
One of the most common questions among those new to tufting is: “How do I stretch the fabric correctly on the frame?” The short answer: gradually, evenly, and without tearing. The full answer is this guide — simple, practical, and studio-tested. By following it, you’ll achieve a smooth, stable base — the key to precise, consistent, and professional tufting.
Contents
- 1. Why tension matters
- 2. What you need
- 3. Preparing your frame and fabric
- 4. Step-by-step stretching technique
- 5. Common mistakes and how to avoid them
- 6. Pro tips: diagonals, corners, and retensioning
- 7. The tool that makes the difference: Canvas Stretching Pliers
- 8. Video and helpful resources
- 9. Frequently Asked Questions (FAQ)
1. Why tension matters
A well-stretched fabric allows the tufting gun needle to move in and out at a consistent depth. If the cloth is too loose or uneven, you’ll get irregular stitches, uneven loops, and soft spots that are hard to finish. The goal: even tension on all sides — firm but not drum-tight, to prevent fabric strain or frame distortion.
2. What you need
- Tufting frame made of wood or aluminum, with reinforced corners.
- Primary Tufting Cloth or compatible Kreoho fabrics.
- Fasteners: staples or tacks, depending on your setup.
- Professional Canvas Stretching Pliers Kreoho® for gradual, controlled tension.
- Clamps to secure the frame to your work table.
- Measuring tape and a fine permanent marker for alignment and center marks.
3. Preparing your frame and fabric
- Secure the frame to your table with clamps — it should be completely stable.
- Cut the fabric with extra margin: leave 8–10 cm (3–4 in) beyond the frame on each side.
- Find the center of the fabric and align the grain (warp/weft) parallel to the frame edges.
- Clean the frame edges: remove splinters or dust that could damage the fabric.
4. Step-by-step stretching technique

4.1 Initial “cross” attachment
- Place the fabric and secure the center of the top edge with 2–3 staples or tacks.
- Gently pull and secure the opposite side (bottom edge).
- Repeat on the left and right sides. You’ll form a “X” tension pattern that stabilizes the fabric.
4.2 Progressive side stretching
- Using the Canvas Stretching Pliers, start from the center of the top edge: roll the gear wheel to advance the fabric toward the edge, then fasten with 2–3 staples.
- Alternate top and bottom, then left and right. Work in small sections (5–8 cm / 2–3 in) to maintain balanced tension.
- Continue toward the corners without over-pulling: the fabric should be smooth, not overly tight.
4.3 Corner finishing
- Fold each corner into a clean triangle and secure with 2–3 close staples.
- If slight ripples remain, release a bit of tension on the tighter side and redo the section with the pliers.
5. Common mistakes and how to avoid them
- Pulling from one side only: causes distortion. Always alternate sides.
- Fabric tearing early: grips too long. Work in shorter, controlled steps.
- Wrinkled corners: fold neatly into triangles; if needed, retighten the last few cm with the pliers.
- Drum-like tension: too tight. Aim for even, moderate tension instead of extreme tightness.
6. Pro tips: diagonals, retensioning, and care
- Diagonal pulls help: if one side loosens, lightly stretch diagonally across the opposite area.
- Quick fix: during tufting, if an area softens, pause, make 1–2 passes with the pliers, and re-secure.
- Keep the gear clean: remove fiber buildup regularly to maintain grip.
7. The tool that makes the difference: Canvas Stretching Pliers

The Professional Canvas Stretching Pliers – Kreoho® make stretching faster, smoother, and more precise. The metal gear distributes force evenly, the ergonomic handle reduces fatigue, and the solid structure ensures stability during long tufting sessions.
- Even tension on every side
- Precise control even on large frames
- Clean corners with minimal effort
Discover the Canvas Stretching Pliers
8. Video and helpful resources
Watch the official Kreoho® video to see how to achieve the perfect tufting base — from frame preparation to final fabric tension, step by step.
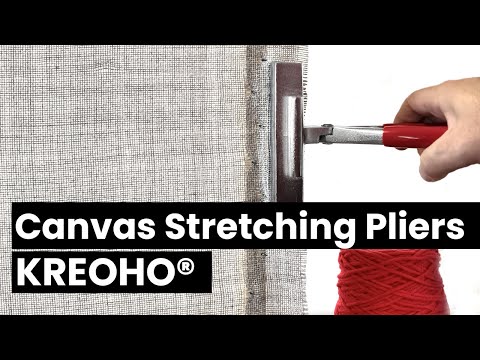
Click the image to watch the video on YouTube
9. Frequently Asked Questions (FAQ)
How tight should the fabric be?
Even and firm: it should resist the needle slightly without vibrating. Avoid excessive tension — it stresses the weave and can cause micro tears.
Staples or tacks?
It depends on your frame. Staples are quick and clean; tacks give stronger hold on thicker frames. The key is consistent spacing.
Can I re-tighten during work?
Yes. Make 1–2 passes with the pliers over the loose area, add a staple, and continue tufting — small adjustments make a big difference in your final result.
Want a smooth, steady base ready for every tufting project? Choose the right tools:
